I am leaving this blog available for folks who enjoy the patterns. I have not updated it since 2014 and I do not intend to update it. I do not receive emails for comments or views or anything. I will no longer be responding to comments, questions or requests. If you have problems with the patterns or directions I recommend referring to youtube for videos of the techniques and stitches I use. All of the techniques I have learned come from youtube, pinterest and a variety of books. I apologize for the inconvenience, I just no longer have the time or interest in maintaining this blog. Best of luck to everyone with your projects.
|
I've been making my own laundry detergent for a couple years now. I make a 5 gallon bucket at a time and it costs me around $6 (give or take). Using 1/2 cup per load of laundry, this will last me almost a year!! It's also really easy and quick to make. Ingredients 1 cup Borax 1 cup washing soda 1 (5.5 oz) bar laundry soap (like Fels-naptha or Zote) .5 oz essential oil (optional, I used cucumber melon this time) 5 gallon bucket with lid Directions 1. Grate bar of soap (use a dedicated grater for this) 2. Melt soap in 4 cups of water over boiling pot of water. This part takes a little time. 3. Pour melted soap mixture into 5 gallon bucket. 4. Mix in borax and washing soda. Mix well. 5. Fill bucket to top with hot water (I use the boiling water from the pot and then top it off with hot tap water). 6. Add essential oil (if using) and mix well. 7. Let sit at least 24 hours before using. *Use 1/2 cup per load of laundry. **This soap with clump up after sitting awhile, all you need to do is give it the occasional stir before using. I hope this helps you save lots and lots of money on overpriced laundry detergent like I did!  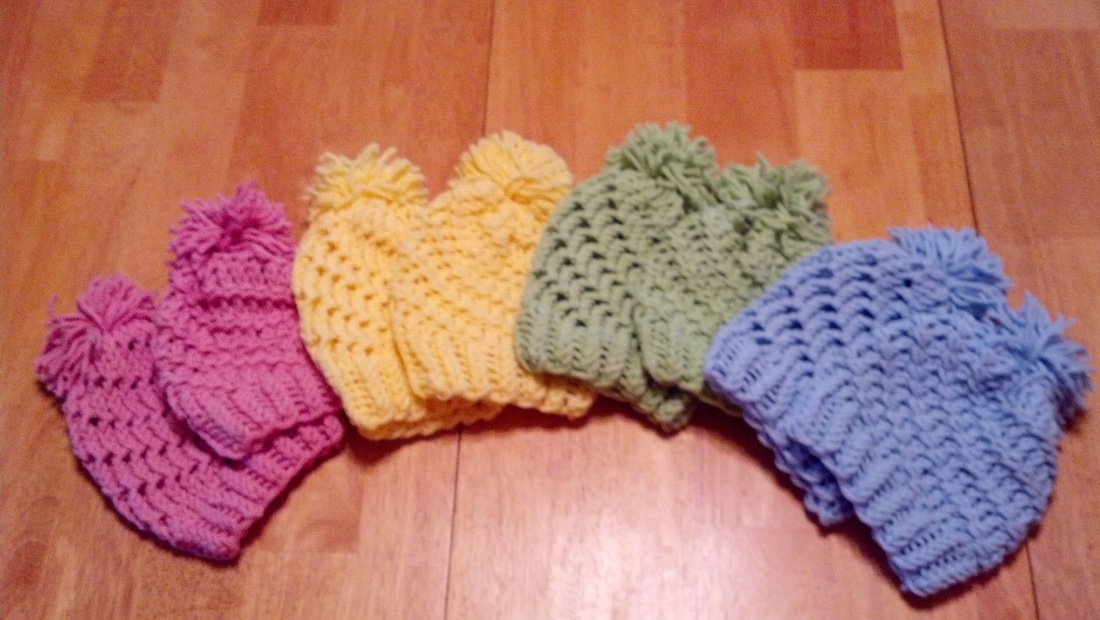 I love clearance bins of yarn. Okay, I love clearance bins of pretty much anything. I found these 4 skeins of lovely soft yarn at Michael's for a steal! I was able to knit 2 baby/toddler hats from each for a total of 8 adorable hats. I knit them in 2 different patterns and topped them off with a pom pom. So cute! 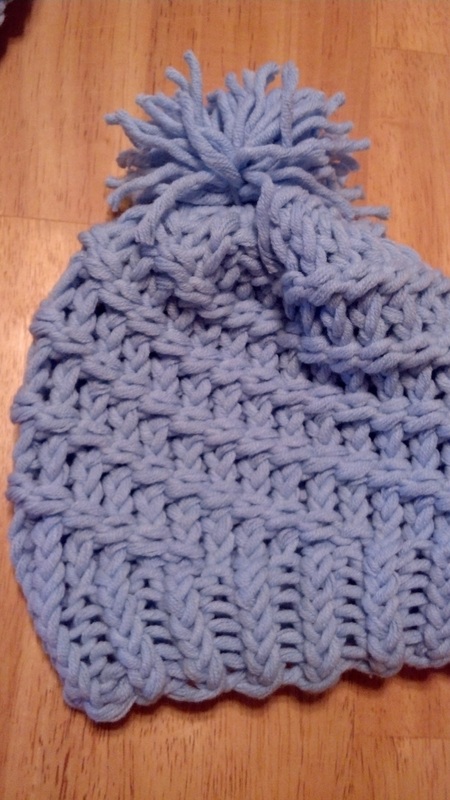 The first pattern I used is the tiny version of my Santa Fe Tweed Ribbed Spiral Slouchy Beanie. Yarn: Lion Brand Baby's First in Fairy Tale (pink), Honey Bee (yellow), Beanstalk (green) or Splish Splash (blue) Loom: 31 peg Stitches used: E-wrap knit, purl Brim: E-wrap all pegs Row 1-6: Knit one peg, purl one peg all around loom, knit last peg Hat Body: Row 7: E-wrap knit all Row 8-32: Knit three pegs and purl two. Continue for all rows. This pattern will overlap rows creating the spiral pattern. Row 33: E-wrap knit all To finish: E-wrap knit all pegs. Decrease by moving the loop on peg 1 to peg 2, the loop on peg 3 to peg 4 and so on all the way around the loom. I finished with a simple gather. Attach pom pom. Speaking of pom poms, I got a new pom pom making tool. I found them in a book store. They had an end cap full of loom knitting stuff. A few books and loom kits and these fancy pom pom makers. I have a set of rings to make poms but they are kind of a pain in the butt and rather time consuming. And they only came in small sizes. I think the biggest one is an inch and a half. I like big pom poms so I usually wrap them on my hands or pieces of cardboard. Now I have these awesome little tools to make poms super fast and somewhat uniform. Yay! 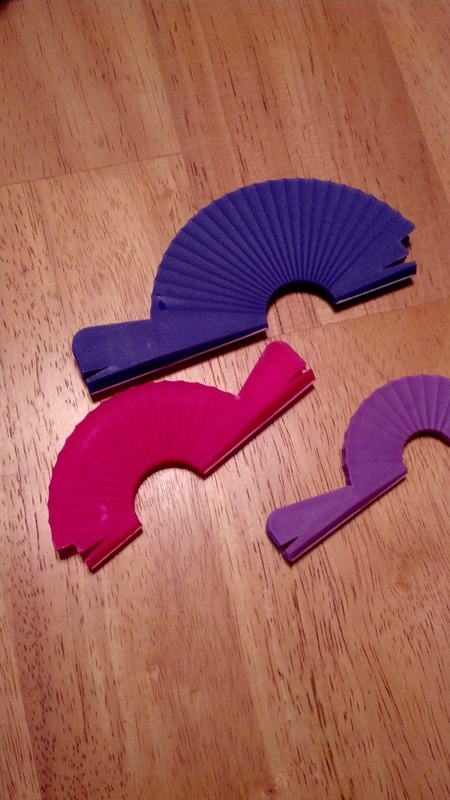  The second pattern I used is a 5+1 spiral beanie. It's the little version of this pattern. Yarn: Lion Brand Baby's First in Fairy Tale (pink), Honey Bee (yellow), Beanstalk (green) or Splish Splash (blue) Loom: 31 peg Stitches used: E-wrap knit, purl Brim: E-wrap all pegs Row 1-6: Knit one peg, purl one peg all around loom, knit last peg Hat Body: Row 7: E-wrap knit all pegs Row 8: Knit 5, move the loop from peg 4 to peg 5 (yarn over) and knit again. Repeat for the rest of the pegs Row 8-32: Because you are knitting on a 5+1 loom, you will end the pattern one over on the next row, this creates the spiral pattern. For all the remaining rows you will do the same pattern, you will notice that there is no loop on peg 5 because in the previous row it was peg 4 and you moved it over. Row 33: E-wrap all pegs and knit off pegs with 2 loops. Row 34: E-wrap all pegs and knit off all. To finish: E-wrap knit all pegs. Decrease by moving the loop on peg 1 to peg 2, the loop on peg 3 to peg 4 and so on all the way around the loom. I finished with a simple gather. Attach pom pom. I really hope you enjoy these patterns. If you have any questions, please feel free to post a comment or send me a message. If you make this hat please post a picture! I'd love to see the finished result! Additionally, these hats are available for sale. $5 each, message me if you are interested. Be sure to check out my Pinterest board, "Loom Knitting" for lots of great loom knitting patterns and resources. **Update! I took all the leftovers from the 8 original hats and knitted this little gem. Isn't it cute?? 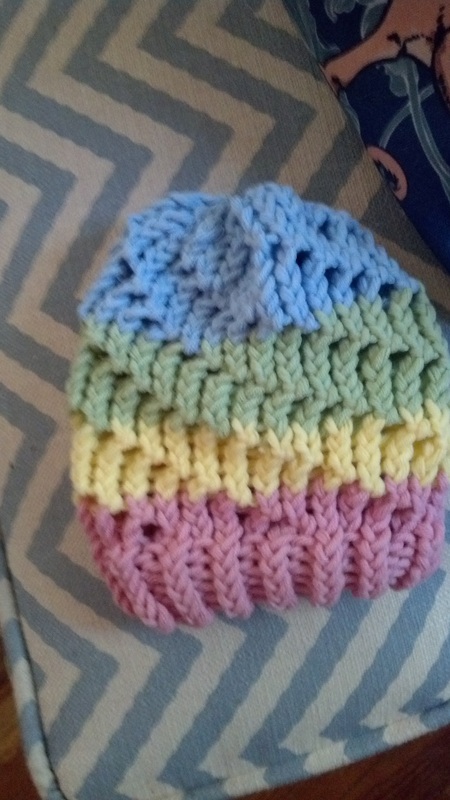  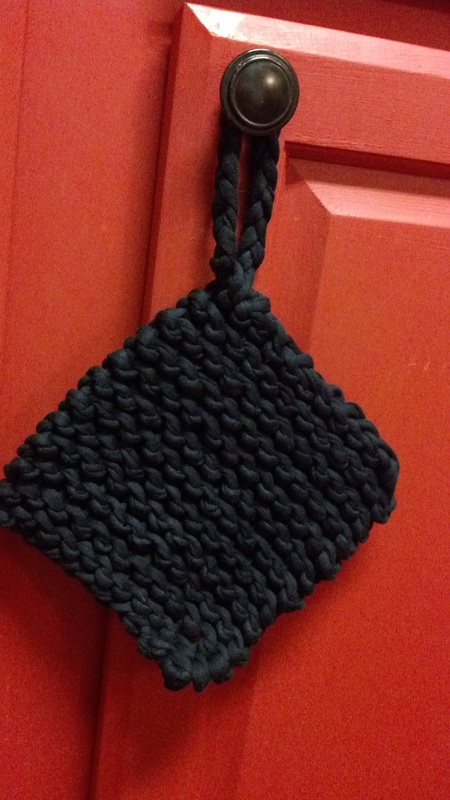 I've been dying to try out t-shirt yarn. I've seen lots of posts on how to make it, I just hadn't gotten around to it. A couple weeks back I found a skein of Lion Brand Fettuccini yarn. It's really similar to t-shirt yarn. It's a knit fabric cut into a strand that is about 1/2" wide when laid out flat but the edges kind of roll up on themselves so it's just under 1/4" wide and pretty thick. Initially, I tried to make a hat. The material is a little stretchy but did not provide enough softness or stretch for a hat. I got about 20 rows in and realized it was not going to work. It would have been the heaviest, most uncomfortable hat ever. However, I realized that it would make a fantastic kitchen or bath scrubby washcloth type thingy. These have been on my list of things to make for awhile so it was a win win situation. Now that it's all done, I am confident that it's thick enough to also use as a potholder. It also doesn't take a ton of material so I anticipate that I can make about 5 of them from one skein of yarn. Yarn: Lion Brand Fettuccini in Solid (black) Loom: I used a 36 peg loom but the pattern only uses 12 pegs Stitches used: E-wrap knit, purl Scarf Body: Row 1: E-wrap 12 pegs, e-wrap peg 12 twice and wrap all pegs in the opposite direction (do not join the round, this will knit a flat panel instead of a tube). Knit off all pegs. This will put the working end of your yarn back at the anchor peg. Row 2: Purl all pegs. Row 3: E-wrap all pegs in the opposite direction. Knit off all pegs. Repeat row 2 and 3 until desired length is reached. For this scrubby I knit a total of 24 rows. To Finish: Move loop from peg 2 to peg 1 and knit off. Move loop back to peg 2. Move loop from peg 3 to peg 2 and knit off. Move loop back to peg 3. Continue until you have only one loop left. I knot the tail of my working yarn to finish. Leave a tail of about 10 inches. Cut an additional piece twice the length of the tail. Thread the additional piece near the tail. Braid the three tails together. Knot off the braid using 2 of the pieces. Thread the remaining tail through the scrubby to create a braided loop. Knot off tail and weave excess into scrubby. Be sure to check out my Pinterest board, "Loom Knitting" for lots of great loom knitting patterns and resources. **Update: I was able to make 5 scrubbies from one skein. I packaged them up with a bar of homemade soap for Father's Day gifts. $8 each. Message me if you are interested! 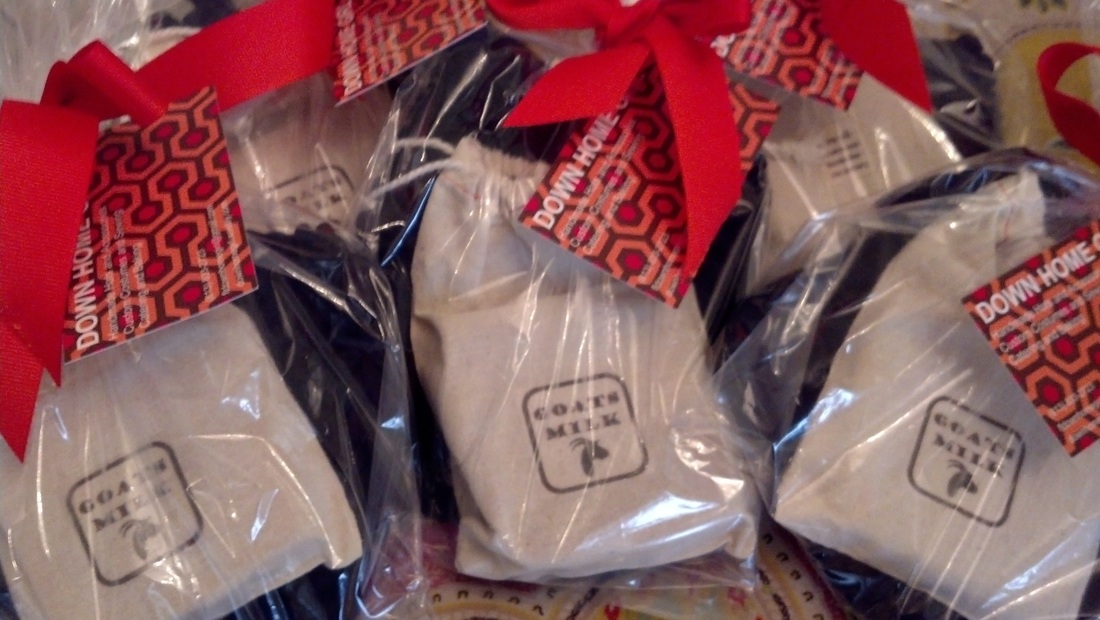  My parents live on their boat most of the time. I try to meet up with them a few times a year while they are out travelling. This year Mother's Day happened to fall during the break between school sessions so Nick and I decided that would be the perfect time to rendezvous. As it worked out, they would be in Maryland. Nick is from Maryland. Win win! Our flight there was a nightmare. Seriously. I don't want to get into but I have decided that I am never flying (domestic) again. At least not if I can help it. And not US Air. EVER. My parents were anchored in Crisfield, MD. They needed to get some repairs done so unfortunately we were stuck there. There's not much going on in Crisfield. We were also there a little ahead of the tourist season so the town was still pretty closed up. We still had a really great time. We went to the Strawberry festival in Crisfield. They only had one little table selling strawberries and those were from North Carolina. Guess I'm a little spoiled from the Plant City Strawberry Festival. On Mother's Day we took the dinghy over to Jane Island Park and had a picnic lunch. We also did a little geocaching. For dinner we went to the Red Roost. It was packed full of families tearing apart crab legs and crab cakes. We took a day trip to Smith Island. It was pretty pointless. The ferry over there was really expensive and there was nothing going on there. Supposedly everyone there speaks with an English sounding accent and everything is really quaint but I didn't come away with that impression. We did buy a 10 layer Smith Island cake that was pretty delicious but I made a 14 layer cake last Easter that was just as good (or better). The next day we drove over to Ocean City MD to check out a huge car show. It was super cool, lots of vintage and antique cars that my Daddy and Nick drooled over. Before we headed home, Nick and I spent a day in Baltimore. We went to the NSA Cryptology museum, Edgar Allen Poe's House in the ghetto and toured the Historic Ships in the Baltimore Harbor. We had dinner at the Horse you rode in on Saloon where Poe used to hang out. It was also the last place he had a drink before he died. We were gone 8 days. It was really nice to get away and spend some time with my folks. It was also really great to get home and back to my pugs. Oh! I knit 7 hats while we were gone. You know, as one does. 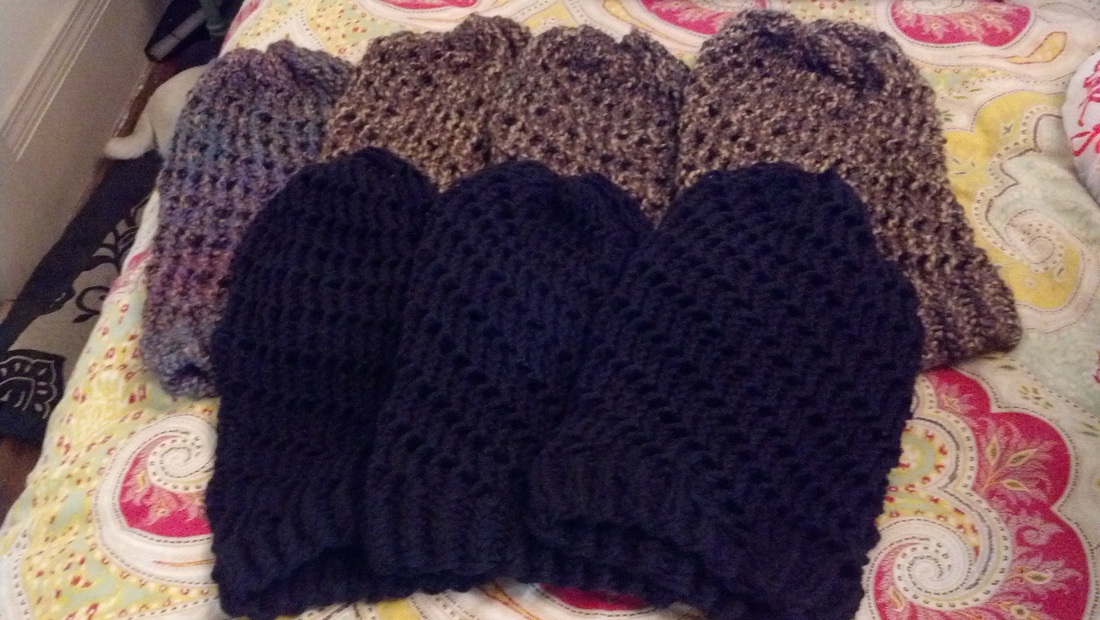
I'd write about how good biscuits and gravy are but my belly is too full. Here's the recipe. Biscuits Ingredients 2 cups cold self rising flour (this is the only recipe I use self rising flour for, I keep mine in the freezer) 1/4 cup cold butter cut into small pieces 3/4 cup cold whole milk (or buttermilk) 1 Tbsp white vinegar (omit if you are using buttermilk) 1/ tsp garlic salt 1 Tbsp bacon grease Method 1. If you are not using buttermilk, add vinegar to milk and let sit about 5 minutes. 2. Using a pastry cutter (or forks or your hands), mix together flour, salt, butter and milk mixture/buttermilk. 3. Do not overwork the dough! It will be shaggy and a little crumbly. 4. Cover with plastic and leave in fridge for one hour. 5. Grease cast iron skillet with bacon grease. Or grease a cookie sheet or small round cake pan. Heat oven to 500 degrees. 6. Roll dough out to 1 1/4 inch thick. Cut out biscuits with biscuit cutter or round glass. Place in greased pan with sides touching. You should get around 8 biscuits. I can only fit 7 in my pan. 7. Bake in center of heated oven for 10-12 minutes or until golden brown. Sausage Gravy Ingredients 6 oz breakfast sausage 1 Tbsp flour 1 1/2 cups whole milk 1/2 tsp onion powder 1/2 tsp garlic salt 1 tsp dried parsley 1/4 tsp fresh cracked black pepper Method 1. Brown and crumble sausage. Do not drain fat! 2. Stir in flour and seasonings, cook together 2-3 minutes over medium heat. 3. Stir in milk. Cook over medium low heat until thickens to desired consistency. 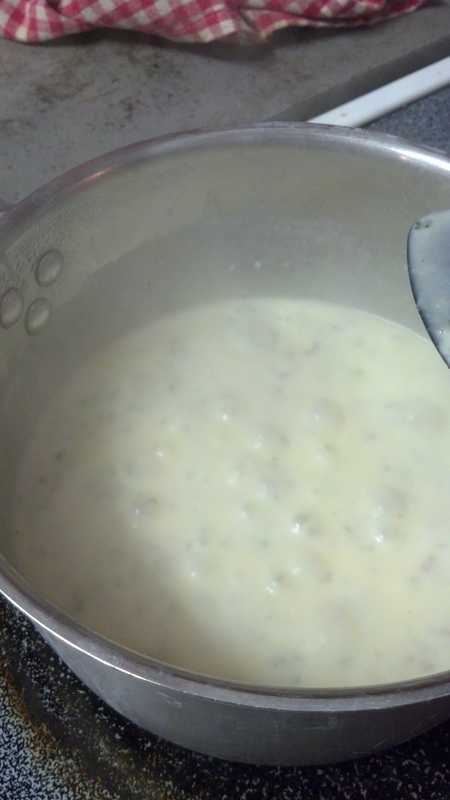 Now I'm going to take a nap. Thanks for stopping by!  I was digging through the clearance bin at Joann's and I found this amazing yarn. To me it looked like a bunch of threads knitted together and then knitted together again to make a fat fluffy yarn. It's a super bulky yarn. It was dark purple with a little green in it. I was super excited! I decided to use it to make a cable knit hat since I have been obsessing about cable knitting lately and also because I thought it would look great in a cable knit. Which it did. I'm really happy with the end result of this hat. The yarn however, did not look as cool as I thought it would. I love it but I thought that it was going to be way cooler than it turned out. Especially on sale for $5.97. That's way more than I usually pay for a skein of yarn. That being said, it's a really cute hat. Yarn: 1 skein Paton's Delish in Fig Loom: 43 Pegs Stitches used: E-wrap knit, purl, cable Brim: Rows 1-6: Knit 1, Purl 1, repeat to end of row Hat Body: Rows 1-4: Knit 2, purl 1, knit 2, purl 1, repeat for remainder of row Row 5: Cable (2 pegs), purl 1, knit 2, purl 1, repeat for remainder of row Rows 5-8: Repeat rows 1-4 Row 9: Knit 2, purl 1, cable (2 pegs), purl 1, repeat for remainder of row Repeat rows 1-9 (3) more times Last 2-3 rows: e-wrap knit all pegs To finish: Decrease by moving the loop on peg 1 to peg 2, the loop on peg 3 to peg 4 and so on all the way around the loom. I finished with a simple gather. Be sure to check out my Pinterest board, "Loom Knitting" for lots of great loom knitting patterns and resources. Message me if you are interested in purchasing any of my hats or if you are in St Petersburg, FL you can purchase my hats at Dollylocks Hair Salon.  Finally! The last piece of the puzzle. Yay! This has been a fun project but It came at a terrible time! I had finals and a ton of other stuff going on. But I digress. To make the cape I created a huge triangle with a flat top. Mine is about 24 inches across the top (it wraps around the bodice to just past the armpits), in the center it is 60 inches long and each side is 59 inches. It is round at the bottom. I cut it out freehand. I seamed together the center and zig zag stitched over the seam. Then I zig zag stitched over all the raw edges because I didn't want to spend 6 months hemming. Finally I sewed a strip of velcro across the top of the cape (hook side) and sewed it's counterpart (loop side) to the inside of the bodice. Drawing up the design for the cape was kind of a pain. I used a huge piece of craft paper and traced out half the cape. Then using Angela Clayton's beautiful cape as inspiration I sketched out the design. I printed a few snowflakes and used them as templates. 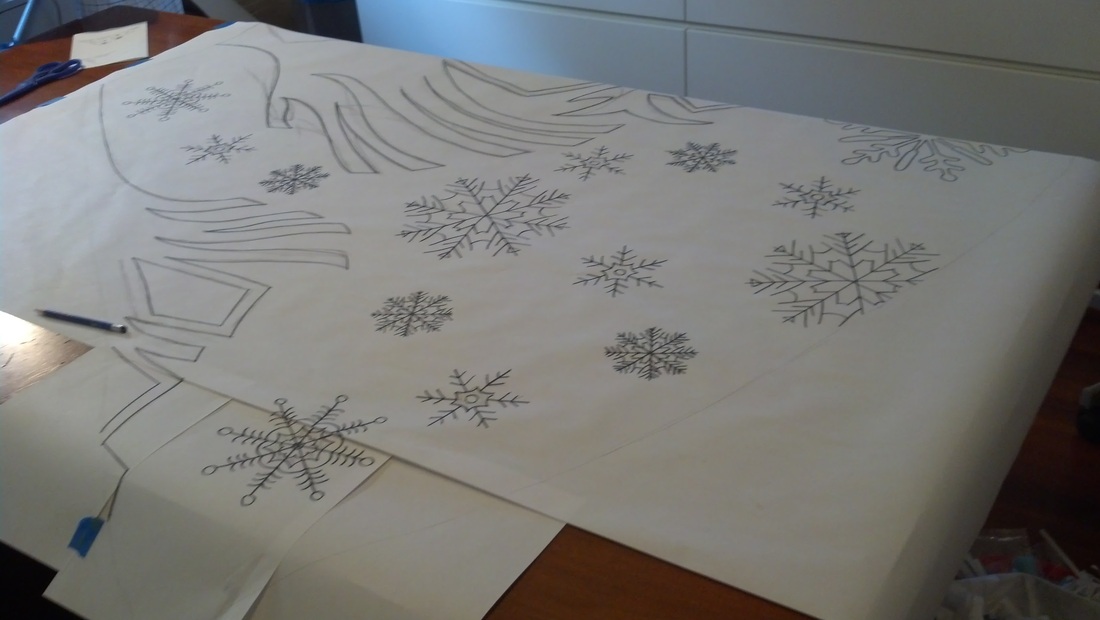 I decided to use glitter to do the snowflakes. I'm a rhinestone junky so this is totally contrary to my first instinct but the pattern on the cape is really subtle. I used white glitter and mixed a little teal glitter in it. The fabric I used for the cape is also probably a little greener than the film but it looks great with the fabric I used for the bodice. It was more important to me to create a cohesive look. I taped the design template to my work table and then laid a clear plastic drop cloth over it. Then I taped the cape into place on top of that. Then I outlined the snowflakes in Elmer's Craft Bond glue and covered them with glitter. For the larger areas I used a paintbrush to spread the glue. I had to work on it in sections so I could reuse the glitter. I even got Nick to help me! Mostly because he was hungry and I wasn't going to cook until I was done, but I'm not one to turn down a helping hand. Here's the final costume with all the pieces. I'll post some pictures of my cousin wearing it as soon as I get some. My dress form is not sized correctly for it so it looks a little droopy in the pictures. Sorry bout that! If you are making this costume I hope my little blog can help you. Be sure to check out my posts about the bodice, skirt, undershirt and general overview for more details on how I made this costume. And be sure to check out my Elsa board on Pinterest for more information. Thanks for stopping by!  It's Ryan's birthday! Yay! His lovely lady Farin asked me to bake a cake for his party. Then they decided it was going to be a BBQ so I suggested apple pies instead. Everyone does cake! It doesn't hurt that I still have a ton of apple pie filling ready to go. Ryan likes pin up girls (who doesn't) so I decided to decorate his pies with pin up girls. Woot! 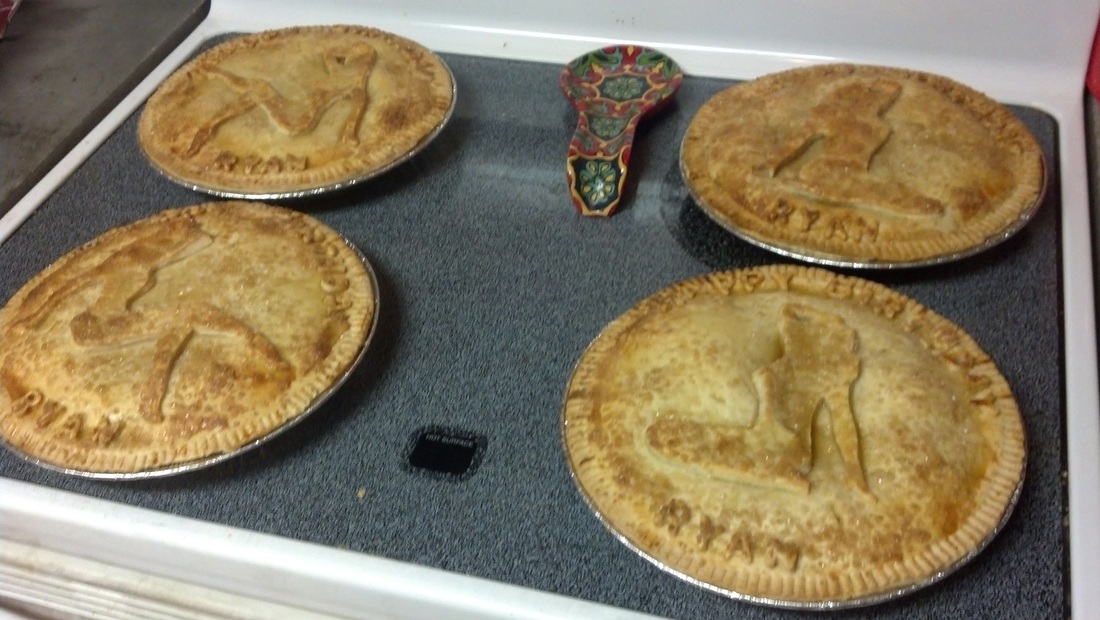 Here's how I did it! Pie Crust (makes enough for 2 9" pies, you'll need extra for the cutouts) 1/2 tsp salt 1/2 cup ice cold water 3 cups all purpose flour 9 Tbsp frozen butter, cut into small pieces 2/3 cup cold vegetable shortening or lard Dissolve salt in water. In a food processor pulse together butter, vegetable shortening and flour until it forms crumbles. Pour in water and pulse until dough comes together. Divide into 4, form into discs and wrap with plastic wrap. Keep in fridge until you are ready to use it. Lightly flour rolling surface and rolling pin. Roll dough out, cut to fit pie pan. Press into pan. Prick bottom with fork before filling. Feel free to use my Apple Pie filling recipe. Roll out top crust and lay over filling. Press together top and bottom crusts. Trim excess dough. Press a fork into the edges of the crust to help seal it. Roll out extra dough and cut out shapes/letters. I printed pin up silhouettes to use as a template. I also used tiny letter cutters to spell out the birthday message. Use egg wash to attach the cutouts to the pie. Then egg wash the whole pie and sprinkle coarse sugar. Don't forget to cut holes to vent! Cover pies loosely with foil. Bake in 350 degree oven for about an hour. Rotate pies half way. Remove foil 15 minutes before finished. Bake until golden brown. 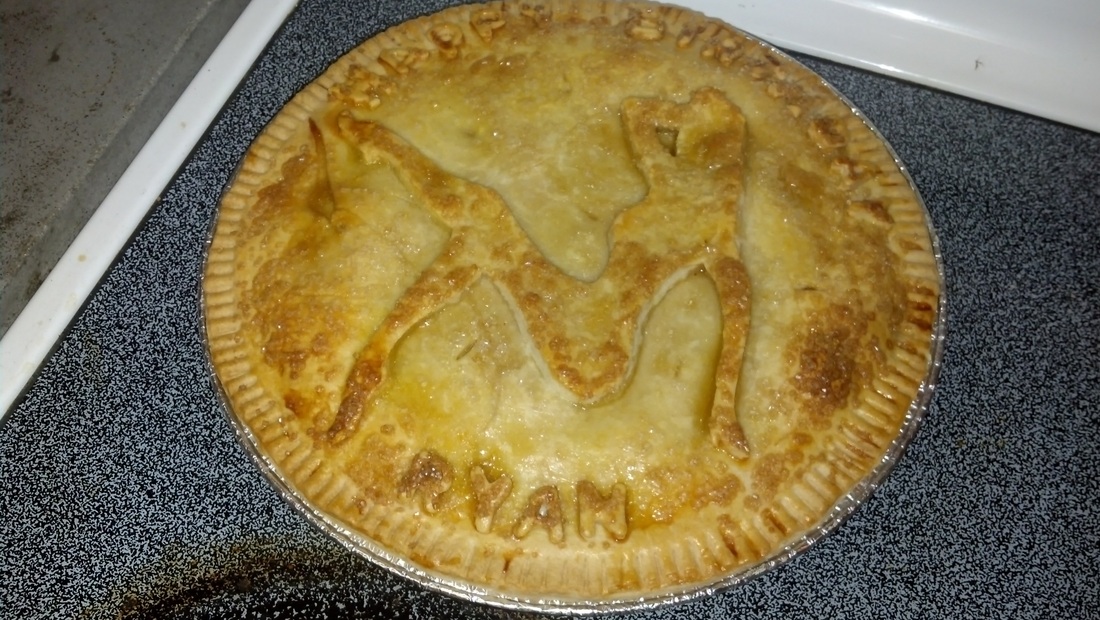  The pattern I used turned out not to be so great although I am happy with my results. It was Simplicity 5914. I wound up having to lengthen and size it differently. I also did an elastic waistband instead of a zipper. Oh! And I had to add the slit over the right leg. 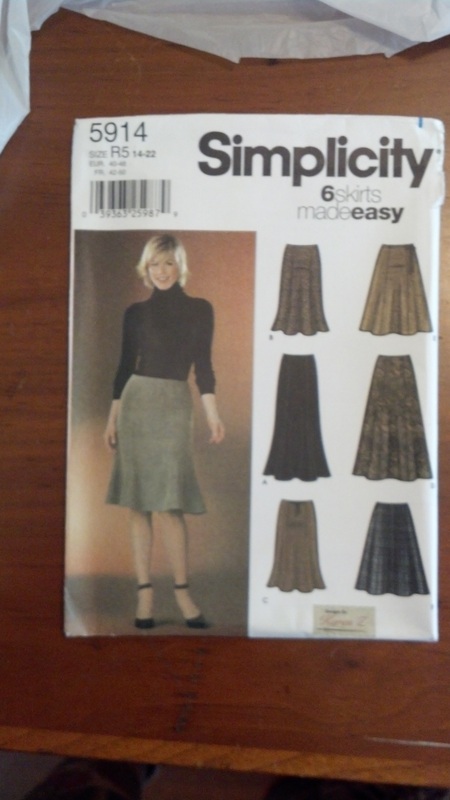 I also added an overlay. I couldn't find one fabric I liked on it's own so I used 2. The pictures aren't really doing it justice. The lining is a blue cornflower satin. The overlay is an iridescent sheer. It matches must better in person, I promise. I adjusted the pattern and cut out the lining, then I used the lining to cut out the overlay. Then I pinned it all together and sewed it up. On the lining I trimmed the seams and zig zag stitched over them to keep them nice and clean. For the overlay I just trimmed them really tight. To get a clean hem I pinned the right side of the overlay to the wrong side of the lining, stitched it together, trimmed the seams, flipped it and then top stitched it. Then I sewed it together at the top, folded it down and pinned it to make a channel for the elastic. I threaded the elastic through, sewed it together, sewed closed the hole and voila! All done! The skirt was pretty easy if not the most exciting part to work on. Lots and lots of long seams on this one. Here's the final skirt with the Bodice and undershirt. All that's left is the cape! 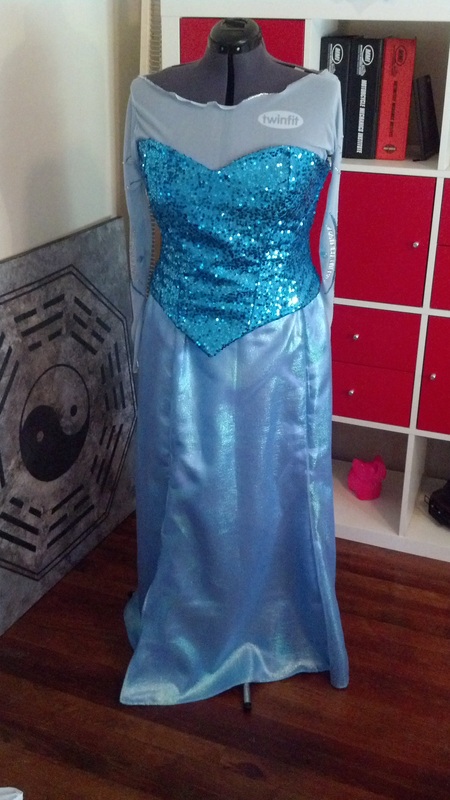 If you are making an Elsa costume, make sure you check out my other blogs about this costume: the overview, how I made the undershirt and the bodice. There's also lots of resources on my Elsa Board on Pinterest. Thanks for stopping by!  |
AuthorJust a girl obsessed with learning new skills and making stuff to wear, eat and enjoy. Archives
October 2018
Categories
All
|
 RSS Feed
